Search This Blog

Sunday, March 25, 2018

What is Kefir?


 Have you heard of kefir? Some people describe it as a drinkable yogurt. I learned a lot about it from Cultures for Health.  I have a lactose intolerance and despite all of the health benefits of yogurt and how much I love it, I couldn’t tolerate it. I learned that the bacteria in kefir feeds off the lactose or sugars in the milk, which makes kefir 99.9% lactose free. I experienced great changes in my digestive system and I did not experience the negative symptoms that I have from regular dairy.

I start with some strong kefir grains that I ordered from Cultures for Health and I used a good quality milk. I don’t have access to raw or unpasteurized milk. I tried using organic milk from the grocery store but I don’t like that it is ultra pasteurized and my kefir grains started to weaken, such as they became smaller and they didn’t hold together as well as they did with other milks. The milk I prefer to use is a local milk, Shatto Milk. My grains are strong and large and my kefir is wonderful.


After my kefir has cultured for 24 hours, I separate it from the grains in a non-metallic strainer, using a non-metalic spoon.


I like to add fruit to finished kefir. I add a ¼ cup of fruit to 2 cups cultured kefir and refrigerate it overnight. In this kefir I used freeze dried blackberries. The next morning I put it in a blender. If my fruit has seeds or stringy, like mango, I strain it after blending it. You can add a sweetener of your choice. Drink 8 oz. daily for great digestion!


Saturday, March 17, 2018

Breakfast Anyone? Easiest overnight oats ever!


I love breakfast food! I have so many favorites! Blueberry scones, eggs and grits, homemade biscuits and gravy, veggie omelet, eggs Benedict, eggs Florentine, homemade pancakes, breakfast casseroles, crepes, root vegetable hash with bacon and fried egg……I could have so many blog posts of just my favorite recipes. However, if I start my morning creating dirty dishes, then I’m already behind the power curve. In my life right now, I need simple.  Breakfast is hard for me. I don’t like cooking breakfast. I’d rather sit down with an instant breakfast, a hot cup of herbal tea and read in the mornings. By instant breakfast, I mean, I don’t want to work by the sweat of my brow to get it, but hey, I’m on a budget and paying $3-$4 per serving for a family of 9 for a healthy breakfast is out of the question.

 My regular family breakfast staples are homemade granola, scrambled eggs with whole wheat toast, and oatmeal. I love the overnight oats. I like having them once a week or so and I like to make them in batches. If I don’t eat the whole batch in a week(two to four jars), then they go bad and I’ve wasted, time, food and money.


With Thrive Life foods, I can make overnight oat weeks ahead! All of your normally wet ingredients are now FD and shelf stable. Once assembled and stored in my pantry, the only work I have to do on a busy weeknight is add liquid and place in the refrigerator for breakfast the next day. 


Blueberries, bananas and honey are now ready when you are.


If you are out of milk, no problem. 
Using yogurt bites in your overnight oats means you only add water. My daughter is lactose intolerant, so we omit yogurt bites and add half a can of coconut milk (also shelf stable) the night before. I like them cold, and my children like to heat them in the microwave.


Here is an easy recipe that I found on the back of a Costco size box of old fashioned oats which I Thrivalized.

Blueberry and Banana Overnight Oats
1/2 cup old fashioned rolled oats
1/2 cup FD blueberries
1/3 cup FD banana slices
1 tbsp. FD crystallized honey
1 tsp. chia seeds

Add all ingredients into a wide mouth pint jar. Close with lid and secure tightly. Can be stored in pantry up to 6 months. 
To prepare, add 1 cup water, close with lid and shake to evenly coat fruit and oats. Place in refrigerator over night or 8 hours before eating. Heat in microwave if desired.


Peanut Butter and Banana Overnight Oats
1/2 cup old fashioned rolled oats

3 tbsp. Peanut Flour
1 tsp. cinnamon
1 tsp. chia seeds

Add all ingredients into a wide mouth pint jar. Close with lid and secure tightly. Can be stored in pantry up to 6 months. 
To prepare, add 1 cup water, close with lid and shake to evenly coat fruit and oats. Place in refrigerator over night or 8 hours before eating. Heat in microwave if desired.


Thursday, March 1, 2018

Raspberry Rolls

Raspberries are on sale this month! Professional bakers use freeze dried fruit in their baking so they can have ALL the flavor and none of the extra water.

I LOVE these raspberry rolls. They are the perfect blend of tart and sweet. The freeze dried raspberries don't add extra water, and so the rolls stay perfectly moist and not wet. The flavor from the fruit penetrates the roll dough and every bite is raspberry heaven.

I use double the butter of the cinnamon roll recipe to adequately refresh the raspberry powder. The lime is essential to balance the fruit and sugar.

These can be made up to 2 days in advance. Once cooled, cover tight with plastic wrap and they will retain moisture. Warm in a 250 degree oven for 5-7 minutes. The quality of flour in important for the flavor, texture and moisture. My flours of choice are King ArthurGold Metal Organic, or Thrive.
  
Sarah's Raspberry Rolls
1.5 doz. large rolls

½ cup sugar
1 ½ tbsp. yeast
1 cup canola oil
1 ½ cups warm water

2 beaten eggs
1 tsp. salt
5 ½ cups non-gmo flour, sifted or 5 c. whole wheat flour

Filling:
½ cup melted butter
½ cup brown sugar
½ cup Thrive raspberries, crushed and seeded
½ tsp. Thrive Limeade powder or 1 tbsp. lime juice

In a stand mixer, mix sugar, yeast, oil and water and let stand 15 minutes. Attach dough hook and add eggs, salt and flour. Once all flour is incorporated, knead 5 minutes. Dough will be very wet. Roll out dough to a 12 x 18 rectangle. In a small bowl, mix the sugar, raspberries and lime powder or juice with a whisk. Spread melted butter evenly over dough and then sprinkle on dry filling ingredients. Roll as a jelly roll. Too loose and rolls will have gaps, too tight and rolls will not rise and fluff. Cut with string and place on a large, parchment lined baking sheet or two 9x13 pans. Let rolls rise for 30 minutes. Bake at 375 degrees for 15 minutes. For conventional oven, bake 10 minutes, rotate pan and bake for remaining 5 minutes. Cool 10 minutes. Spread on icing with a pastry brush while rolls are slightly warm.

Icing:

For Raspberry Rolls
2 cups powdered sugar, sifted.
1 tbsp. butter, melted
½ tsp. Thrive Limeade powder or 1 tbsp. lime juice
2-4 tsp warm water

Whisk icing ingredients together. Add water to desired consistency. Icing should be a thick paste consistency. (slightly thicker than white glue)

Thursday, February 15, 2018

Sarah's Cinnamon Rolls


 Once upon a time I operated an in-home bakery. I only advertised in my neighborhood and word spread quickly. I met many wonderful new friends through my little bakery. 

My number one selling baked goods were my cinnamon rolls. I only put a handful of items on my menu every week but cinnamon rolls were on the menu every week! I focused on whole foods and good quality ingredients. I used non-gmo or organic flours. I offered 100% whole wheat options in cinnamon rolls, sandwich bread, cookies and cakes, in addition to white pastry flour confections. I grew up baking with only whole wheat flour that my mother ground herself in our family electric wheat grinder and so it was only natural for me to offer these in whole wheat. 

These can be made up to 2 days in advance. Once cooled, cover tight with plastic wrap and they will retain moisture. Warm in a 250 degree oven for 5-7 minutes. The quality of flour in important for the flavor, tecture and moisture.. My flours of choice are King Arthur, Gold Metal Organic, or Thrive.
  
Sarah's Cinnamon Rolls
1.5 doz. large rolls

½ cup sugar
1 ½ tbsp. yeast
1 cup canola oil
1 ½ cups warm water

2 beaten eggs
1 tsp. salt
5 ½ cups non-gmo flour, sifted or 5 c. whole wheat flour

Filling:
¼ cup melted butter
1 tbsp. cinnamon (2 tbsp. for copy cat Cinnabon)
½ cup brown sugar
¼ cup nuts
½ cup raisins

In a stand mixer, mix sugar, yeast, oil and water and let stand 15 minutes. Attach dough hook and add eggs, salt and flour. Once all flour is incorporated, knead 5 minutes. Dough will be very wet. Roll out dough to a 12 x 18 rectangle. Spread melted butter over dough and then sprinkle cinnamon and sugar. Roll as a jelly roll. Too loose and rolls will have gaps, too tight and rolls will not rise and fluff. Cut with string and place on a large, parchment lined baking sheet or two 9x13 pans. Let rolls rise for 30 minutes. Bake at 375 degrees for 15 minutes. For conventional oven, bake 10 minutes, rotate pan and bake for remaining 5 minutes. Cool 10 minutes. Spread on icing with a pastry brush while rolls are slightly warm.

Icing:

Maple
2 cups powdered sugar, sifted.
1 tbsp. butter, melted
½ tsp. maple flavoring (this will darken the icing) or 1 tsp. maple extract
2-4 tsp warm water or milk

Whisk icing ingredients together. Add milk to desired consistency. Icing should be a thick paste consistency. (slightly thicker than white glue)


Wednesday, February 7, 2018

Southwest Chicken Pasta Skillet in a Jar

Southwest Chicken Pasta Skillet in a jar
 Adapted from Chef Todd

This has been a family favorite for many meals. You can add more of any vegetable. Also, you can substitute the sour cream and limeade powders with fresh sour cream and lime when you fold in the pasta.

-Layer in jar
1 cup FD chopped chicken
½ cup FD red bell peppers
½ cup FD chopped onion
½ cup FD sweet corn
2 TBSP FD green chili peppers
¼ cup Instant black beans

-Bag in jar
1 tsp. Chef’s Choice Seasoning Blend
1 tsp. garlic powder
1 tsp. chili powder
1 tsp. cumin
1 tbsp. FD cilantro

-Bag in jar
½ cup Veloute’
½ tsp. Summer Limeade Powder
½ cup Thrive sour cream powder

-From pantry
1 Tbsp. butter
1 Tbsp. garlic, minced (optional, may use powdered)
1 tsp. hot sauce
4 cups water
1 lb. Pasta

1.     Cook Pasta according to package directions. Drain and set aside.
2.     Saute’ the garlic in butter. Add chicken, bell pepper, onion, corn, chili peppers and black beans. Add 4 cups of water and spices. Bring to a simmer.
3.     Cover with lid, simmer for 15-20 minutes until beans are tender.
4.     Once cooked, add in the Veloute’, limeade powder, sour cream powder and hot sauce with. Simmer 1-2 minutes while stirring.

5.     Fold in cooked pasta. Garnish with cilantro, diced avocado and tomato. Serves 6-8

Monday, February 5, 2018

Frosted Lemonade

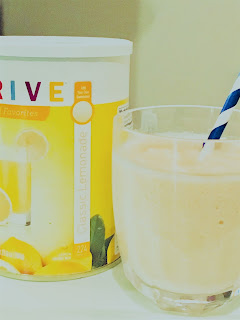
Tonight, I enjoyed making frosted lemonades with my children. It's snowing outside and all I wanted was a frosted lemonade from Chic-fil-A. The closest Chic-fil-A to me is 30 minutes away. Their lemonade was the best lemonade I had ever tasted, until I tried Thrive's Classic Lemonade.


Thrive uses lemon oil to flavor their Classic Lemonade. You use your own sweetener, allowing you to indulge as healthy or not so healthy as you feel in the moment. A little goes a long way, as one pantry can makes 22 gallons!

We made two quarts of frosted lemon goodness. This is a seasonal item, released in June every year. It's still in stock, but that will only be while supplies last. Get it while you can, before you have to wait until June!


Frosted Lemonade
by Sarah Griesmyer

4 c. Vanilla Ice Cream
2 c. Ice
2-3 c. Water (less with soft ice cream, more with hard ice cream)
1/2 c. sugar
1 scoop Thrive Classic Limeade

Mix in blender on low speed until mixed. Turn up blender to med-high speed for 30 seconds until smooth. Serve immediately. Serves 6

Thursday, February 1, 2018

New Meals in Jar using February Specials!

February Specials from Thrive are here! 


I've created some amazing recipes for you to try using this month's specials. My teenage son loves that he can pick a dish and make it. I love that a healthy meal is prepared and I didn't have to cook it!
  
True to my Indian food craze, I have another Indian inspired meal for you. I found this recipe from Whole Foods, and I must say, it warms my soul on these cold Midwest winter days. We made it twice in one day this week. 

I love curry. It's earthy, yet, it's versatile in what you can pair it with. Curry is different in every dish. Did you know that curry is not a single spice? It's a combination of turmeric, cumin, coriander, cardamom, cinnamon, cloves, cayenne, and ginger. Each blend is different, so try out different blends. Curry pastes are what I prefer when I cook from the refrigerator. If I use a dry curry, then I prefer to make my own. This way I can control the flavor, heat and the salt. The curry you choose is what makes the dish. Here is a good recipe for making your own curry spice. Here is a good grocery store curry. If you prefer a milder curry, I recommend checking out a local Indian Grocery or you can order one off amazon here

With Thrive, you are finished in 30 minutes! Did you check out the original recipe? Did you calculate the time to make the dish? Almost 1 ½ hours!


Beef and Potato Curry with Spinach
½ c. Thrive onion, FD
1 tbsp. Thrive green chilis, FD
1 tsp. garlic powder
1 c. Thrive beef slices (alternative – mushrooms), FD
½ teaspoon fine sea salt, plus more to taste
1 ½ tbsp. mild or spicy curry
½ c. Thrive diced tomatoes, FD
½ teaspoon sugar
1 ½ c. Thrive potato chunks, D
½ c Thrive spinach, FD
1 tbsp. Thrive cilantro, FD

Ingredients for cooking day:
2 tbsp. olive oil
1 (13.5-ounce) can light coconut milk
½ of a lime

To Cook: Heat olive oil in a deep skillet or medium pot on medium heat. Measure 4 cups water. Empty jar into pot with hot oil and stir constantly for 10 seconds. Pour in 4 cups water and coconut milk and stir. Bring to boil. Cover and reduce to low. Simmer for 20 minutes, stirring occasionally. For a thicker sauce, uncover and simmer for 10 more minutes, stirring often. Squeeze lime juice into dish. Salt to taste. (Careful! The salt varies greatly on curries) Serve with rice and garnish with fresh cilantro.


Spinach Frittata
Breakfast for dinner. Or just have yourself a fancy breakfast in half the time!

Layer in Jar:
1 c. Thrive Scrambled Egg mix, FD

Zipper Sandwich bag:
½ c. Thrive Chopped Onion, FD
½ c. Thrive Spinach, FD
½ c. Thrive Tomato dices, FD
½ c. Thrive Mushrooms, FD
½ tsp. Thrive Chef’s Choice Seasoning
½ tsp. Thrive Pepper Blend

Zipper Sandwich bag:
½ c. Monterey Jack Cheese, FD

Cooking Day Ingredients:
1 tbsp. Butter
1 tbsp. Olive oil

Layer ingredients in order in quart size jar. Place cheese in sipper sandwich bag and place in jar. Close tight with lid.

To cook: Preheat Oven to 400 degrees.
In a small container with lid, toss cheese with 2 tbsp. of water. Gently shake container several times during the cooking process. Measure 2 ½ cups of water. Melt oil and butter on medium heat in non-stick skillet. Add water and whisk in vegetables and spice bag. Simmer 2-3 minutes. Quickly whisk in egg and cheese and immediately transfer skillet to oven and cook 5-6 minutes, watching closely until eggs set and begins to brown slightly. Cut into wedges and serve with salsa.


Applesauce Banana Muffins in a Jar
This makes a very moist muffin. The bananas must be chopped well, to fit everything into the jar. My bananas are not chopped enough in the picture. I had to use some tricks and a lot of patience to get it to all fit.


Applesauce Banana Muffins in a Jar


Layer in jar:
3 c. Thrive banana slices, chopped
1 c. vanilla flavored sugar
¼ c. Thrive applesauce
¼ c. Thrive Scrambled Egg mix

Zipper sandwich jar:
2 cups flour
1 teaspoon baking soda
1 tablespoon baking powder
1 teaspoon salt

Day of cooking:
Mix-ins (Optional): ½ c. Chocolate chips, ½ c. walnuts, 1 tsp. cinnamon

Preheat oven to 350.
Remove sandwich bag from jar. Pour 2 ½ c. water into blender. Pour contents of jar into blender. Blend just until smooth. Add flour mix and pulse just until combined. Remove blender from base and hand stir in any mix-ins. Spoon into paper lined muffin tins.
Bake for 20 minutes, rotate pans and bake another 5-10 minutes or until wooden toothpick inserted in center comes out clean. Remove from oven and cool on wire rack. Makes 24 muffins.


Creamy Mushroom Rice with Spinach         
This is a traditional dish in my family. I grew up making this with good ol’ cream of mushroom soup. Now I prefer to have this as a lighter, healthier dish. The Jack Cheese in the end gives it a nice creamy texture. Of course, if you are craving comfort food like your mom used to make it, add ½ cup sour cream powder and ½ c more water.


Creamy Mushroom Rice with Spinach     

Layer in Jar:
2 c. Thrive Instant Brown Rice
¾ c. Thrive Spinach, FD
¾ c Thrive Mushrooms, FD
1 tbsp. Thrive Chicken Bouillon
2 c. Thrive Instant Brown Rice
1 tbsp. Thrive parsley, FD

Zipper sandwich bag:
½ c. Thrive Monterey Jack Cheese

To cook:
Remove bag of cheese from jar. Pour cheese and 2 tbsp. water into container with lid. Gently shake to moisten cheese and repeat throughout cooking process.  Add contents of jar to 2 2/3 c. water and 2 tbsp. butter. Bring to a boil. Reduce heat to simmer. Cover and cook on medium low for 8 minutes. Let stand 5 minutes covered. Stir in Cheese and serve. For vegetarian option, substitute mushrooms for chicken. Serves 4-6

Tip: If using regular brown rice, increase water to 5 c. and increase bouillon to 5 tsp. Cover and bring to a boil until steam releases from covered pot, about 15 minutes. Keeping lid on, turn to low and cook another 10 minutes. Turn off heat and let sit 5 minutes.


Strawberry Banana Butter Cream Frosting
The first time I made this, I had to restrain myself from eating it with a spoon. I am not a frosting person, but this is AMAZING!  I put this frosting on a plain yellow cupcake and I had to look at the cupcake twice while I was eating it to make sure it wasn't a strawberry cupcake. 

Thrive Bananas are very different in color and texture from dehydrated bananas. They taste like a real banana, because they are!

Strawberry Banana Butter Cream Frosting

½ lb. Butter
1 lb. Powdered Sugar, sifted
¼ - ½ c. milk
1 tsp. pure vanilla extract
¼ c. freeze dried banana powder
¼ c. freeze dried strawberry powder

Whip butter until almost white. Slowly mix in fruit powders, ¼ c. milk and sugar, 1 cup at a time. If frosting is too stiff, add more milk, 1 tbsp. at a time. Makes enough frosting for an 8 or 9 inch two-layer cake.

Chocolate Frosting: Omit fruit powder and add ½ c. fine cocoa powder.


Thursday, January 25, 2018

Chicken Tikka Masala

My goal is to post monthly. I even aspire to post weekly...But this recipe is so good that I can't wait!

My family has indulged in Chicken Tikka Masala for years. I stumbled upon this recipe while looking for a Butter Chicken recipe and we've been hooked ever since. I was  introduced to Indian Cuisine about 10 years ago and the spice and flavor keep bringing me back to it. I love ethnic dishes. I grew up in a vegetarian household and a large majority of ethnic dishes are vegetarian. Lots of flavor and lots of spice were the star in those meals of my youth, and although it is not vegetarian, spice and flavor take a front seat in this dish.

I was given a challenge to convert Chicken Tikka Masala into a meal in a jar. I LOVE Chicken Tikka Masala, so I could not pass up this challenge. Actually, I think I hijacked this opportunity. I love this dish!

I'm also excited to use a new ingredient. Garlic! You might be thinking, "Really?" That's new? Well, for a meal in a jar, Thrive doesn't sell freeze dried garlic in bulk because they won't source their ingredients from countries like China. So, I'm on my own in the garlic department. This week I shopped at a discount surplus store and found a 5 lb. bag of dried garlic slices!! I should probably compose myself, because after all, its just garlic, but I won't. I'm excited to use this in my Meals in a Jar!


Chicken Tikka Masala in a Jar


Layer ingredients in 3 parts.

In a Quart Size Jar:
1st part: Chicken Marinade
½ c. Thrive Greek yogurt bites
½ tsp. Thrive Lemonade powder
2 tsp. ground cumin
1 tsp. ground cinnamon
½ tsp. cayenne pepper
1 tsp. Thrive Peppercorn blend
1 tsp. ground ginger
1 tsp. Thrive Chef’s Choice Seasoning or salt
2 c. Thrive Grilled Chicken Slices


In a ZIPPER SANDWICH BAG:
2nd part: Sauce
1 tsp. dried garlic flakes or ½ tsp, granulated garlic
1 tsp. Thrive Green Chilis
1 tsp. ground cumin
2 tsp. smoked paprika
1 tsp. Thrive Chef’s Choice Seasoning or salt
½ c. Thrive Tomato Powder
1/3 c. Thrive Sour Cream Powder
1 tsp. Thrive Cilantro
  
In a ZIPPER SANDWICH BAG
3rd part: Rice Seasoning
1 tsp. whole cumin
2 tbsp. Thrive Chopped Onion
1 tsp. Thrive Chef’s Choice Seasoning
1 tsp. dried garlic or ½ tsp granulated garlic


Day of cooking Ingredients:
2 C. Uncooked basmati or white rice
2 Tbsp. olive oil or butter, divided

Layer 1st part of ingredients in a quart jar. 
Measure 2nd part of ingredients into a zipper sandwich bag. Close bag and label as sauce bag and place in jar. 
Measure 3rd part of ingredients into a zipper snack size bag. Close and label as Rice Spice bag and place into jar

Cooking day:

Remove 2 bags from jar. Add 1 c. of water to chicken and marinade in jar. Close jar tightly and gently toss to coat all the ingredients with water - repeat this often as you cook the rest of the meal. 

In a medium pot, add 1 tbsp. olive oil, spice bag and 2 cups basmati rice to 4 c. cold water. Bring to a boil, cover and reduce heat to low for 15 minutes. Turn heat off but do not remove lid. 

While rice is cooking, place a cold sauce pan on the stove. In sauce pan, whisk contents of sauce bag with 2 ½ cups of water. Add 1 tbsp. olive oil, turn heat to medium and bring to a simmer, whisking often until sauce starts to thicken.   

Fold chicken and marinade into sauce. 

Simmer 2-3 minutes. Serve over rice. Garnish with fresh cilantro.
If you like Indian food, and even better if you like Chicken Tikka Masala, 
your taste buds will thank you for days!